As part of our series for developing Android/iOS apps using react native, in the previous tutorial, we have seen how to set up react native on the Mac.
In this tutorial, we are going to learn about how to create your first Android and iOS app using react native.
There are basically, two ways to build and create a React Native mobile app.
I personally prefer using the expo tool for developing React-native apps. It has many advantages, that I will explain in some other blog.
Here is the command to run the react-native iOS app.
react-native run-ios
If you don’t have an app simulator installed on your system, you will see the following error.
(node:42707) Warning: Accessing non-existent property 'padLevels' of module exports inside circular dependency
(Use `node --trace-warnings ...` to show where the warning was created)
error iOS project folder not found. Are you sure this is a React Native project?.
Here is the command to run the react-native Android app.
react-native run-android
If you don’t have an app simulator or Android SDK installed on your system, you will see the following error.
(node:43018) Warning: Accessing non-existent property 'padLevels' of module exports inside circular dependency
(Use `node --trace-warnings ...` to show where the warning was created)
error Android project not found. Are you sure this is a React Native project? If your Android files are located in a non-standard location (e.g. not inside 'android' folder), consider setting `project.android.sourceDir` option to point to a new location.
Installing Android SDK is a cumbersome job.
Instead of Android SDK, use the expo tool. You will never regret it. More interestingly, It is open source.
This tool has a command-line interface called expo-cli. You can install it using npm the package manager. Open the terminal and run the below command.
npm install --global expo-cli
Go to your project directory and initialize your project to run it on the expo tool.
expo init
Start the expo tool.
expo start
You will see the QR code.
In the case of the Android app, open the Expo Go app on your Android mobile. You can install the Expo Go app from the Play Store. Scan the QR code with the Expo Go app.
In the case of the iOS app, open the Camera app on your iOS/iPhone mobile and scan the QR code.
Congratulations your react-native app is running!
WARNING: The legacy expo-cli does not support Node +17. Migrate to the new local Expo CLI: https://blog.expo.dev/the-new-expo-cli-f4250d8e3421.
Note that when you execute the expo start command, it is being executed with the global Expo CLI tool.
If you want to use local CLI instead of global CLI, execute the below command.
npx expo start
If you get the following error while executing “expo start”
WARNING: The legacy expo-cli does not support Node +17. Migrate to the new local Expo CLI: https://blog.expo.dev/the-new-expo-cli-f4250d8e3421.
.. use global CLI.
If you want to publish an app to the Play Store, you have to create the build.
First of all, create an account at the expo dev website by signing up. An Expo user account is required to proceed.
eas build:configure
You will be asked for the username/email and password of your expo account. Once you enter credentials, your project will be mapped to the expo dev. You can see your project is listed on the expo dev dashboard.
Create Android App Build:
Here is the command to initiate the build process for the Android app.
eas build -p android
Create iOS App Build:
Similarly, you can create an app built for iOS.
eas build -p ios
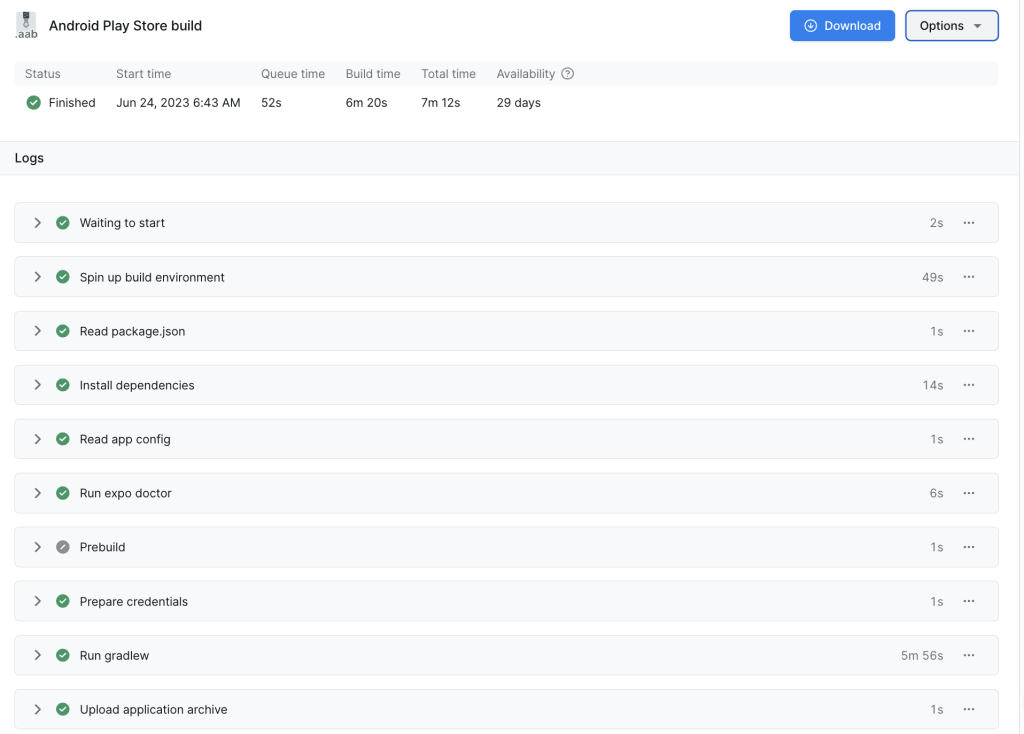
You can track the build processing on the expo dashboard. There are multiple steps involved.

It just takes around 6-7 minutes to complete the build. And that’s all.
You are just one click away from publishing your App on the play store.
If you face any challenges while creating react-native or Android/iOS build image, ask me in the comment. I will give my best to help you.